Showing posts with label Ubuntu. Show all posts

Thursday, 13 August 2015

Virtualbox 5.0 and Yosemite 10.10.1

sAt last after long time this happen running OS X on VirtualBox, not without off a lot of f....k.
But this post is not about how to install OS X on VirtualBox but how you can access host share folder without guest addictions.
Well if you need help on that this is a good place for start...
 http://www.macbreaker.com/2015/01/virtualbox-yosemite-zone.html
My system that I try this is Ubuntu 15.04 as host and VirtualBox 5.0, the guest OS X Yosemite 10.10.1, running AMD Apu.


 kernel 3.19.0-23


my system is up to date and VirtualBox 5.0 was a .deb file from Oracle.

The Yosemite inside VirtualBox,


So how to share a folder from host?

We will use smb to get this files on virtual machine, from VirtualBox forum...
Until there is Guest Additions for Mac OS X, you can still share folders on the host with the guest via the network. It is pretty simple:

1) Share a folder from the actual host machine (from the OS itself, not through the vbox shared folders settings)
2) Use NAT for your guest's network settings
3) From Mac OS X, Open "Finder" (looks like a square face, usually on the bottom-left)
4) From the top menu, navigate to Go->Connect to Server
5) For "Server Address" enter smb://10.0.2.2
6) Click "Connect"
7) Enter your username and password (for the host machine)
8) Select the shared folder from the list

This is the method I am using in my Mac OS X guests until the new Guest Additions is implemented.
by paulscode

How to Access Host's Shared Folder from MacOSX Guest

From help.ubuntu.com, open terminal and input one at time

sudo apt-get update
 
sudo apt-get install samba
 
 
if samba is installed terminal will tell you that is installed and the newest,


create a samba password, I have used my root password but is up to you,


sudo smbpasswd -a your-user-name

and it look like,

""sudo smbpasswd -a sony""

Make a folder for share

mkdir /home/your-user-name/folder-name

user name the same as your login and folder name "Yosemite"? maybe.

Backup your smb.conf,

sudo cp /etc/samba/smb.conf ~

and now edit smb.conf

sudo nano /etc/samba/smb.conf

to save the edited file ( ctrl+x ) you will be asked if you want to save your changes, press ( y ) for yes, or trick part ""sudo  nautilus"" navigate to /etc/samba/smb.conf and edit and save the file from there as root.

What to edit in this file, is more add... to the end of the file

[Yosemite]
path = /home/your-user-name/Yosemite
available = yes
valid users = your-user-name>
read only = no
browseable = yes
public = yes
writable = yes
restart samba

sudo service smbd restart

and back to VirtualBox to access the samba share folder


in finder  go to go and connect to server


and input smb://10.0.2.2, this is the address of your host


and input your-user-name and password.

Thanks to the original bloggers for all the info, and please visit there’s  sites.

Friday, 31 August 2012

Gnome instead of Unity

I have been using the Ubuntu Unity till today get annoyed with Unity and the dash, so moved to Gnome 3, this is installed on the system by default but if you have the automatic login then you don't have the choice of the desktop manager for the section that you are login to. To sort this out go to System settings and change the automatic login to the request password, next time you boot your system you can choose the desktop manager for the current login and after till you choose change this again.
At login you have this Ubuntu icon click on it and you have others options one off that is Gnome.

Monday, 11 April 2011

Ubuntu 11.04 beta Unity bar and Compiz manager

 Ubuntu 11.04 beta Unity bar and Compiz manager

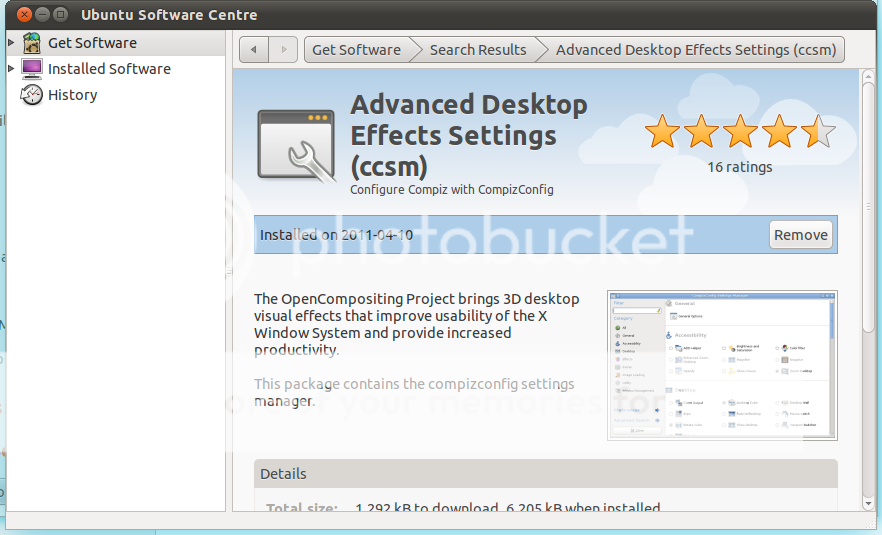
The default settings of Unity bar is a bite too much for my taste but you can change them with "CCSM" "CompizConfig Settings Manager",first you have to install this using the software center, by clicking on the shutdown icon and select system settings,
this will open the control center,

navigate to system and select Ubuntu software center, and type compiz,
and select the "ccsm" advanced desktop effects settings, after install go back to system settings by clicking on the shutdown icon, in control center under  personal you have the "ccsm" advanced desktop effects settings, by default  you only have 4 virtual desktops but this can be changed too in "ccsm"
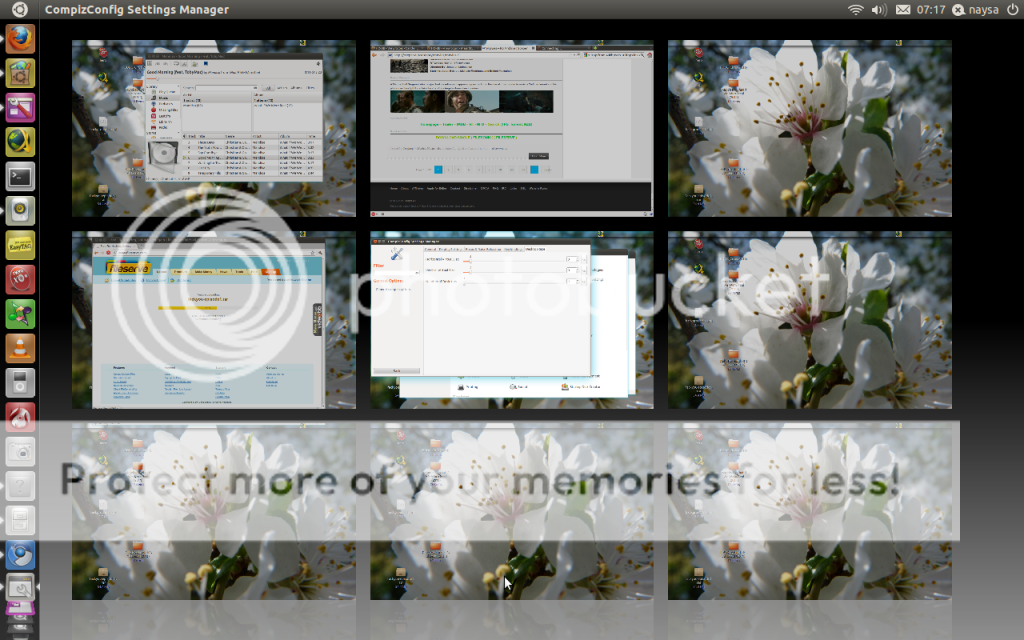
too change the virtual desktops from 4 to 9 click in general options, and click in desktop size tab,
slide the vertical or horizontal or both,
and you will have more virtual desktops, change  the size of the icons in the unity bar, in "ccsm" click in unity icon and experimental bar and slide the bar to the left and the icons will change from the default 48 to 32,
the decoration of windows are black on mine i have change for blue or any other color, and you can see the new Ubuntu have a new slider on windows.
Wallpapers transition in Ubuntu
Ubuntu
Wallpapers
Compiz

Thursday, 7 April 2011

Wallpapers transition In Ubuntu

Wallpapers transition in Ubuntu
  this is a slideshow that change at given time to a new wallpaper, you have this build it in Ubuntu, to access this you have to right click on you desktop
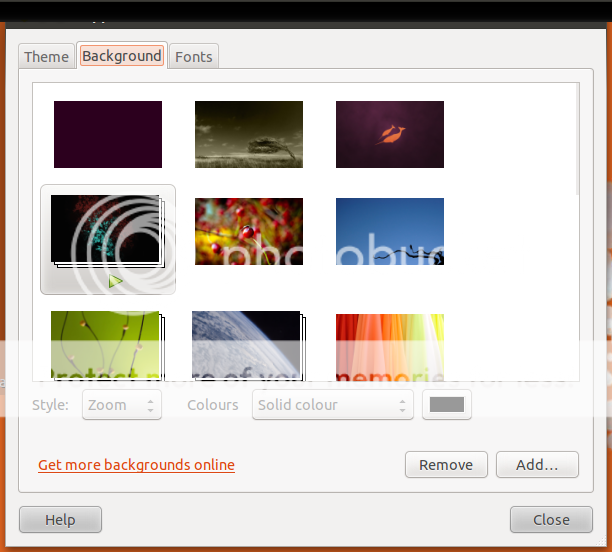
appearances preferences window will open
and the backgrounds that have a player icon is the ones that make this transitions
but in Ubuntu in my install I only have two called "cosmos" and "contest", but if you have your won wallpapers or add some on else transitions, well this is very easy but you have to use root access. I add made my won transitions using the "background-1.xml" from {usr/share/backgrounds} and rename the wallpapers on the .xml file. Before go to explain how to make your won transitions and if you want try my won that can be download from my Drapbox here name of the file is rjm.zip, to place this folder in {usr/share/backgrounds} open terminal and type
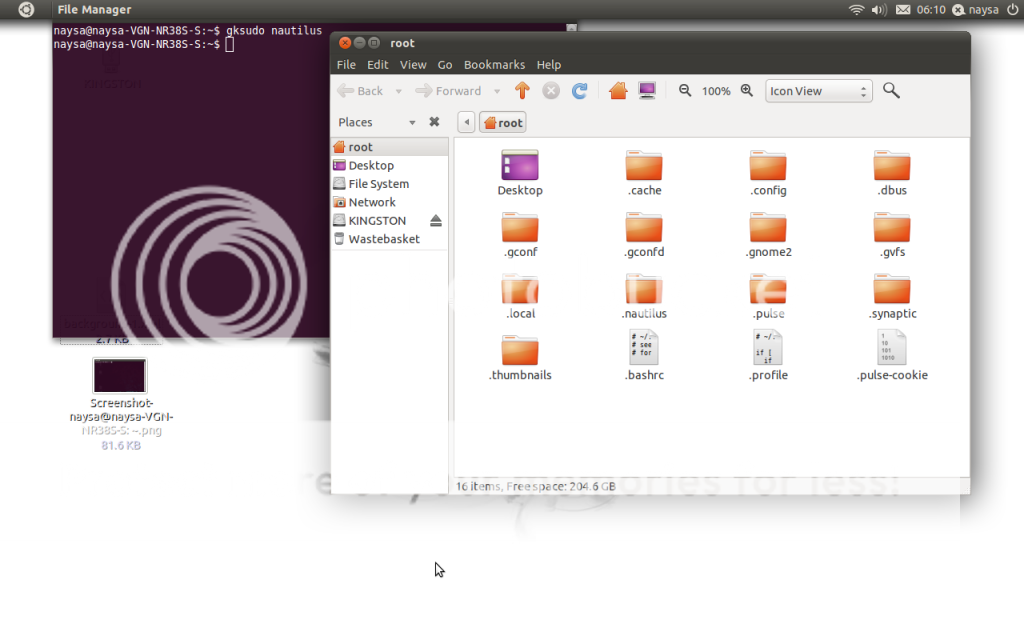
gksudo nautilus
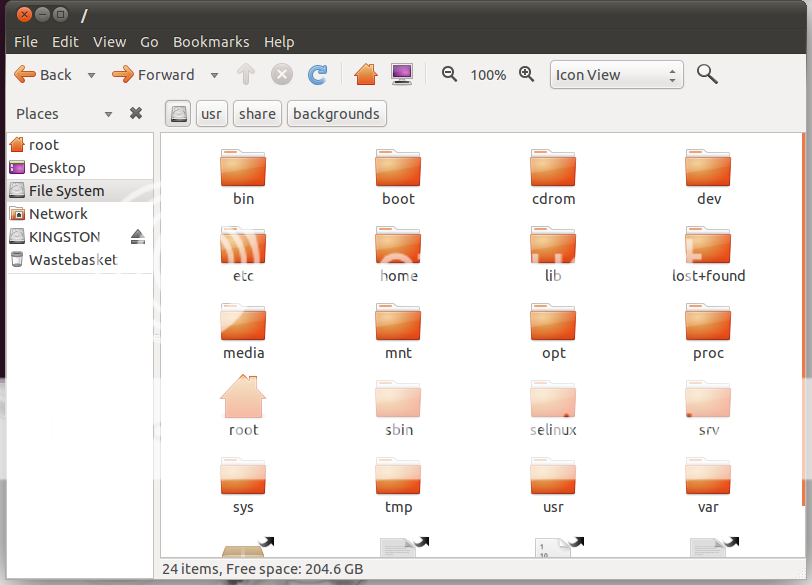
a folder will open called root
 click in file-system
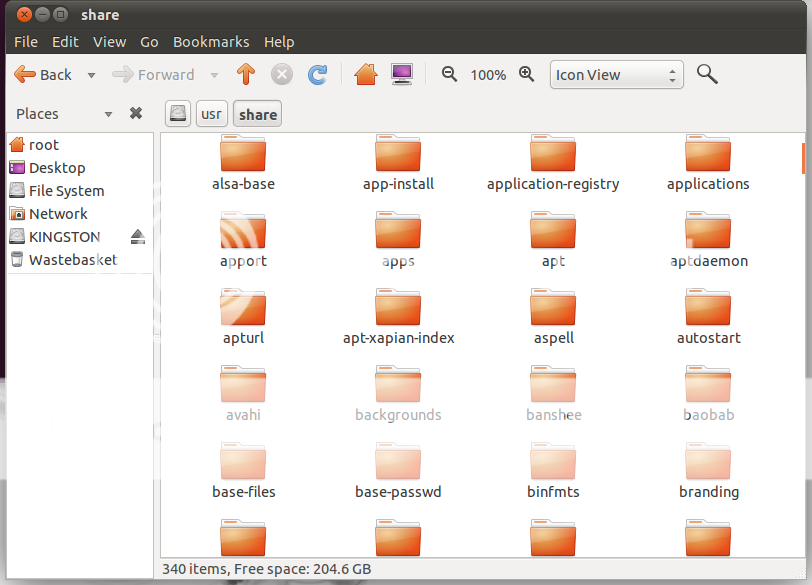
usr/
share/
backgrounds/
copy and past or drag and drop the rjm folder, close this folder and ternimal.
Right click in your desktop

change desktop background
click add, add wallpaper window will open
go to rjm folder in /usr/share/backgrounds/rjm and change the view to all files and select the "background-1.xml"
 now this transitions is working
that is it my transitions with some wallpapers from www.rjmonteiro.blogspot.com
Ok, but you have your won collection of wallpapers and you want make your self this transitions! How to edit the background-1.xml?
navigate to the /usr/share/backgrounds and copy the "background-1.xml" to your desktop or other place, open it with text editor:

what you need edit!
{static static}
{duration 1000.0 duration} in my custom {.xml} every 10 minutes a wallpaper change, in the default .xml is "1795.0" +/- every 30 minutes,
on transition from A to B
{transition transition}
{duration 5.0 duration} : this takes 5 milliseconds on transition A to B
renaming the wallpapers that you want in your custom transitions, you can see the file appears at least twice, A this wallpaper name and location, A to B transitions of wallpaper.
For my custom transitions I ad make this folder called "rjm" copy some wallpapers rename them to wall 1 to 10, move this folder to system/usr/share/backgrounds, added to appearances the background-1.xml and is only the .xml that you need enable on appearances background. I hope this help someone, comments are welcome.

Thursday, 17 March 2011

GTKPOD ON UBUNTO FOR MANAGING YOUR IPOD


This is a good manager on Ubuntu, but nothing like Itunes, first give errors that i don't understand, and it need a exterior player that is "xmms" but you can use any other player like "rhythmbox" or in my case "smplayer", to do this you have to go |Edit\Preferences\Music Tab click on commands and change the commands "play now"
xmms
for
rhythembox
or full path
usr\bin\rhythembox

Gtkpod site @ http://www.gtkpod.org/wiki/Home
Ubuntu forum @ http://ubuntuforums.org/archive/index.php/t-1449007.html

Monday, 1 November 2010

AWN, "avant window navigator"

AWN, "avant window navigator" make your Ubuntu look more MacOSx, with lots of themes to personalise, here is to that i made for my last eye candy. Above screenshot.

 to get this theme and install instructions go here
http://gnome-look.org/content/show.php/Naysa+T?content=134386
 to get this theme and install instructions go here
http://gnome-look.org/content/show.php/Naysa+T01?content=134388 thanks to the author of "adium-connecting-4" icon
Places:
http://wiki.awn-project.org/
http://azmo35.deviantart.com/
http://www.iconspedia.com/icon/adium-connecting-4-17238.html
http://gnome-look.org/

More on the way.

Saturday, 16 October 2010

Creative webcam vf0470

Today i finally got the sound of my webcam to work with Cheese on my Ubuntu 10.04 but it still not working on Skype, after some googling this is my solution https://help.ubuntu.com/community/Webcam
# start a terminal window/xterm window
# type: sudo alsamixer
# using the tab key, make sure to be either in "all" or "capture" mode
# using the left/right arrow key, navitage to the correct "slider"

* (I'm not sure if the right one was front mic (left/right) or just plain "mic" or Mic Boost but I enabled them all)

# if the value at the bottom of the slider says "M" then your device is on "mute" - Hit the "m" key to togger the mute / un-mute
# using the up/down arrow, adjust the setting to get as much green as possible w/o getting in the red zone.
# repeat for all lables that look like "mic", "front mic" "Mic Boost" etc...
# exit alsamixer
# test your audio. I installed "cheese" to do a quick audio/video recording test but you can also test with "sound recorder" or the skype test call etc...
http://wwww.ubuntuforums.org/showthread.php?p=9300767
open a terminal type, gstreamer-properties click enter
but in this case i have played with sound until on my speekers came the sound of my voice, after a quick test on Cheese "yes" it is working, maybe this will help some one, now more googling to solve the sound on Skype "rerr****werr".

Tuesday, 3 August 2010

Mkvextract command line in Ubuntu.

This post is to help me, because i forget the things very easy, so for me and maybe for you this is very easy.

Open applications and go to Ubuntu software centre search box write mkv
and install "command line tools to create and work with Matroska media files". Assuming that you have the "mkvtoolnix" on your system " http://www.bunkus.org/videotools/mkvtoolnix/downloads.html "
How to extract the files from mkv?
All of my files go to my Downloads folder so open Terminal and use de command cd " change directory " exp: cd Downloads
Remember folders have up and lower cases letters, now that you have used de "cd" change directory command this is the easy part the name and the id of the tracks for the extraction, for the id or the tracks use mkvinfo
The command line is
mkvextract tracks myfile.mkv 3:myfile.S_TEXT/UTF8
This is a example for a 3 tracks mkv, if you wanted extract the video use the codec id for that track
command line
mkvextract tracks myfile.mkv 1:myfile.V_MPEG4/ISO/AVC

This help me to remember maybe help you to.

Ubuntu
mkvtoolnix

Tuesday, 8 June 2010

How to install JDownloader on Ubuntu 10.04

Today i install JDownloader on my Ubuntu 10.04 desktop, and after some trial and error i came with this small how to:

software;

JDownloader
Java

first thing you need install java, open terminal and type

sudo apt-get install sun-java6-jre sun-java6-plugin sun-java6-fonts


Terminal can be found Applications/accessories/Terminal

now go to JDownloader site and download it to the desktop
when finish extract it to the desktop and again open the Terminal and type
cd Desktop
cd JDownloader
sudo chmod +x JDownloader.jar
 close the Terminal window and open the folder JDownloader on desktop and right click on the file JDownloader.jar and Open With Sun Java 6 Runtime
  at this point if everything  went well you will see the splash from JD
you have been successful reboot and follow the how to for adding the program to the panel with is own icon,
right click on the top panel and Add To Panel,

click Custom Application Launcher, click Add
in this launcher type the mane of JD and on the command browse to the JDownloader.jar, but i have move all the JDownloader folder to my Documents, 

you will have a new icon on the panel
 right click on this new icon and go to properties and change this icon to JD icon,

you can found this icon in the folder JDownloader/jd/img/splash.png
the result
useful links:
Ubuntu forum here
Ubuntu 10.04 The Perfect Desktop here
JDownloader here
My Wallpaper here